Let me start my Revit tutorial by explaining a couple of things…
I won’t discuss in details what can Autodesk Revit do here… since you can just simply google it. (for short, it’s Autodesk’s answer for a Building Information Modeling software). This is more of a technical aspect tutorial.
So let’s start…
Let say you like to create your own dream house. (in my case, my parent’s house extension). and you like to try this Revit thing. (and you’re an autocad master already…) On a quick note, Revit is like a modeling software, the main difference to other modeling software are:
- Revit can store data. (i.e. Your Door model can be labeled with the type, manufacturer, cost, even the paint color.
- It can calculate the length, Area, volume, etc. of almost any object you model.
- It can be a drafting tool too. But for detailing, (i.e. Mullion details, Door jamb details.) it would be best to do it in Autocad then later link it to revit.
- Almost automatically produce dimensions, levels, etc. (well, assuming that you modeled it correctly.)
- and many more… (generate schedule, perspective, instant visualization, etc.
So first things first, when you’re using revit… Check the path for your local files. (assuming you’re doing a worksharing project. I’ll discuss it in the future…) It’s a good practice.
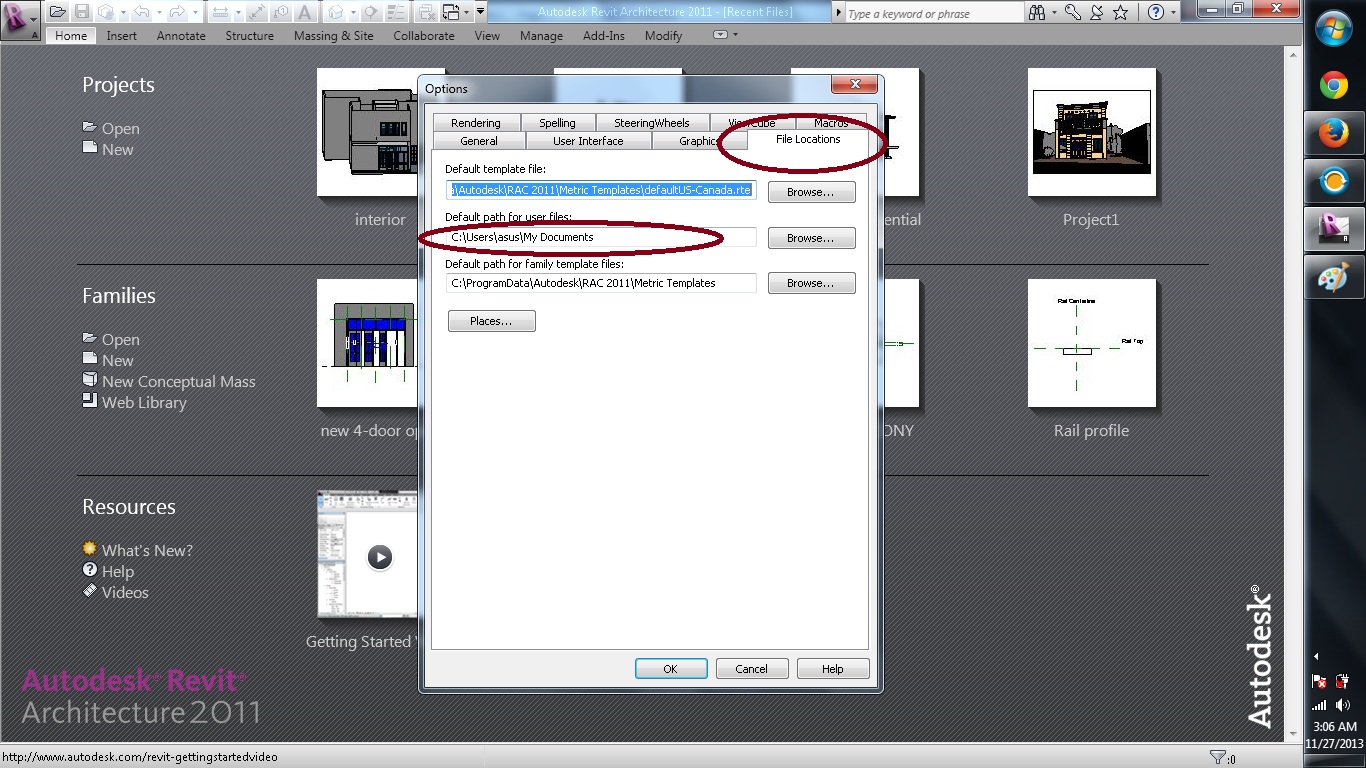
STEP 1: Go to Option Menu
Step 1: Go to option menu and check whether your local files are in the correct designated folder. Click the Upper Left button (the big R) and choose option at the lower part of that window.
Step 2: Click the file location and check whether it is on the right folder
Step 2: Click the file location and check whether it is on the right folder. The reason I’m saying this is that in some companies, BIM modeler doesn’t work only with 1 project. Thus, if for example, you’re working with a “Worksharing Project-A” yesterday, but now your boss handed you the new “Worksharing Project-B”, then all of your local files will mix on that same file location if you didn’t change it. (Just Housekeeping purposes)
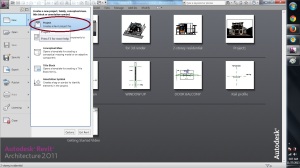
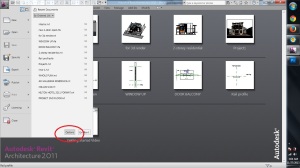
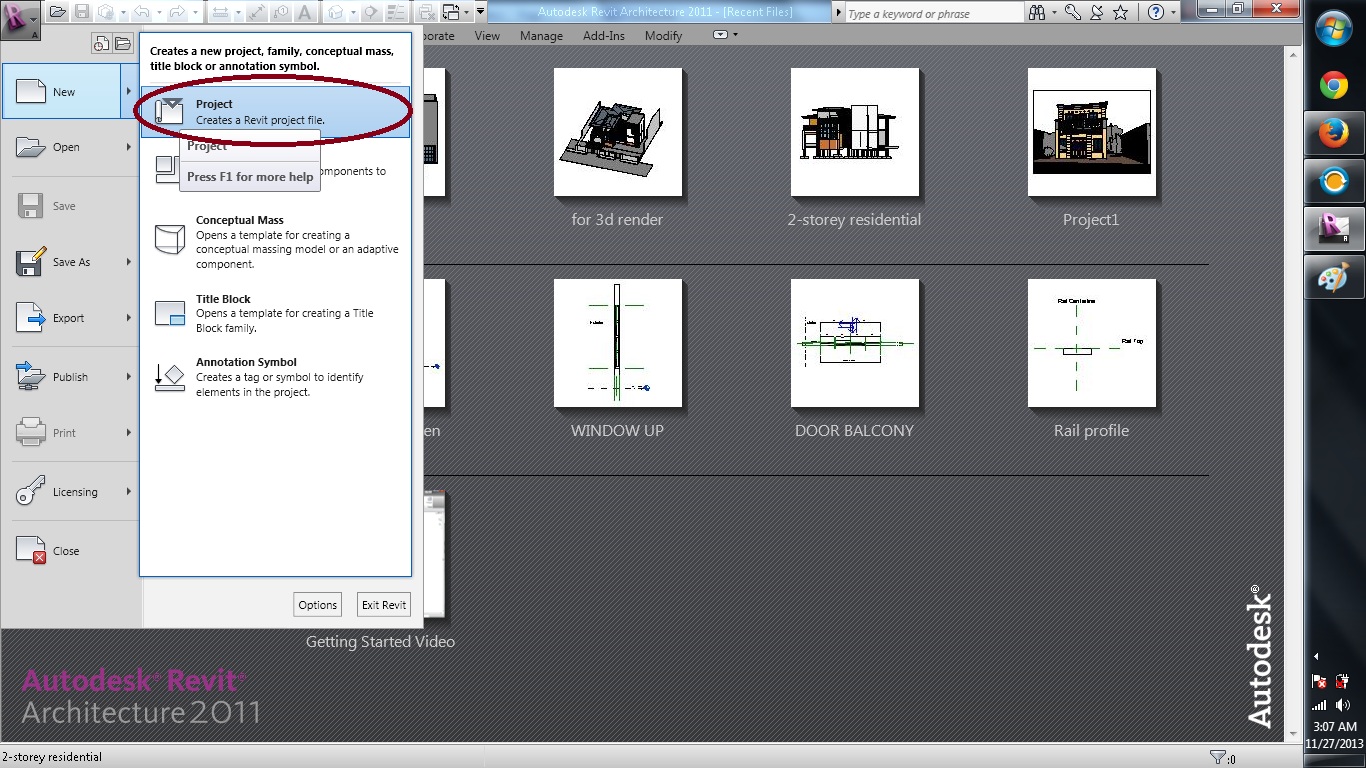
Step 3: Creating a new file
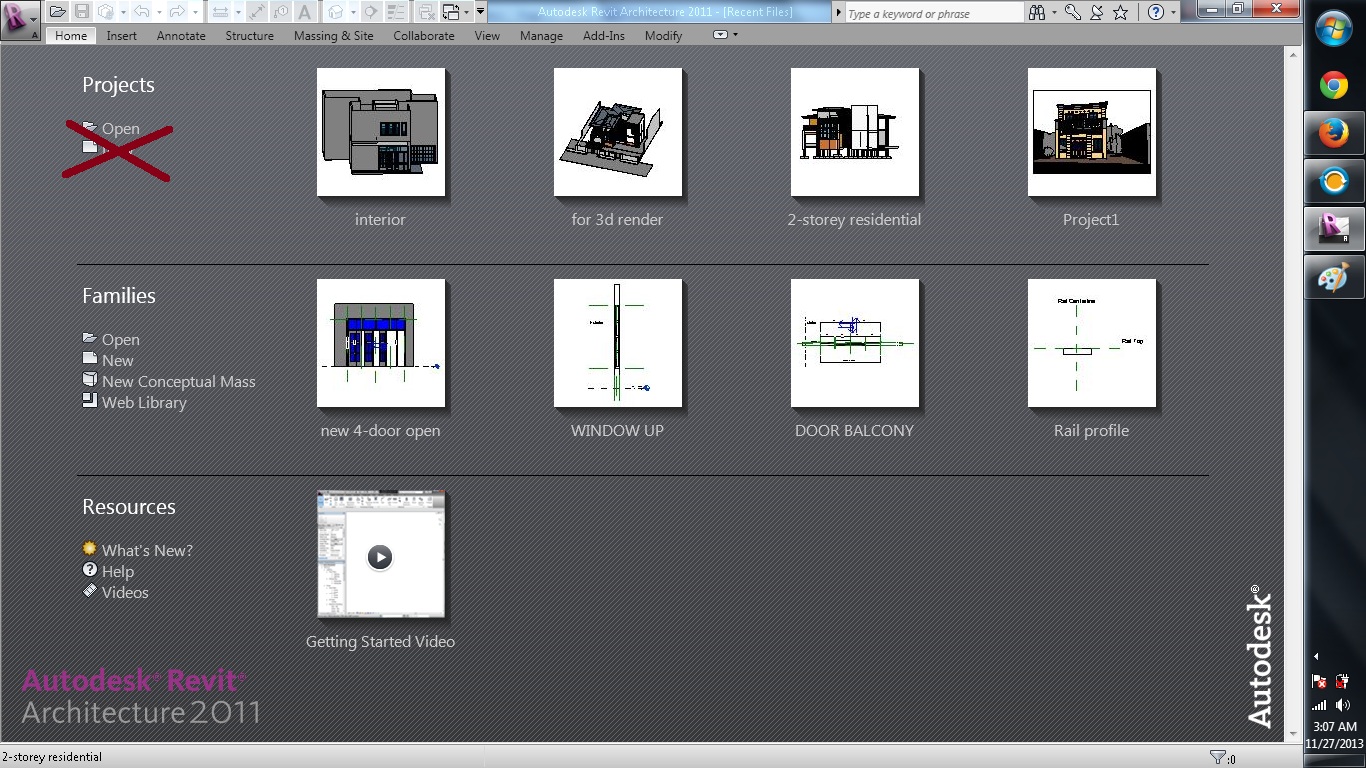
Step 3: Creating a new file. When creating a new file, always use the New file button @ the Main Dropdown menu of revit. Don’t use the New file shown at the default view of revit. (See image below… the one with the cross-mark) Since it will automatically use Metric or English template (Depending on how you installed your Revit.) And, you can’t choose your own self-made template if you’re using that button.
Don’t use this New file
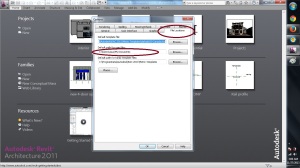
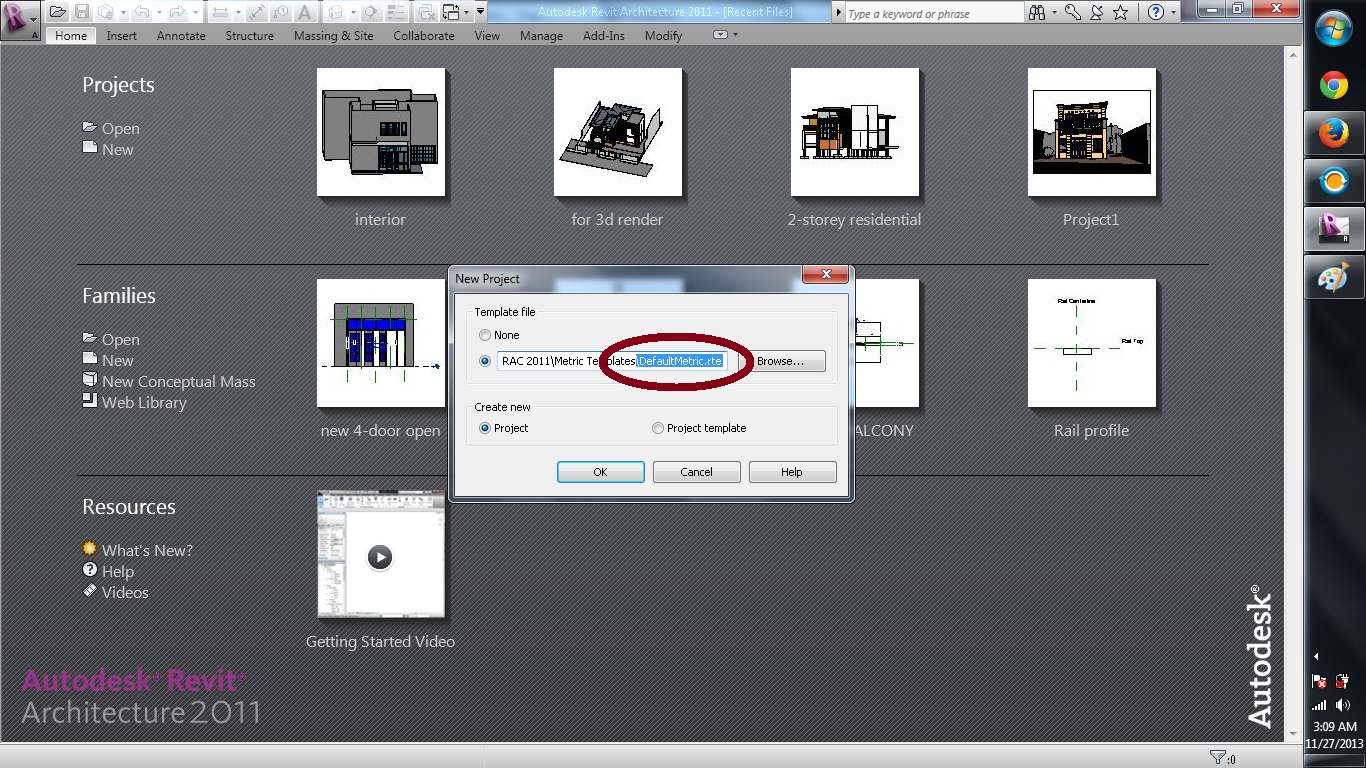
When you use the New file button under the drop-down box of the R-button, this will appear. (See below)
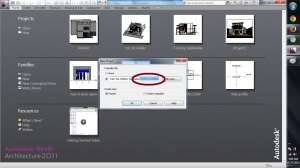
You now have the power to choose your own template!
See, by using the suggested new file button, you now have the power to choose your own template, and/or create a new template. After clicking the Ok button, this will appear:

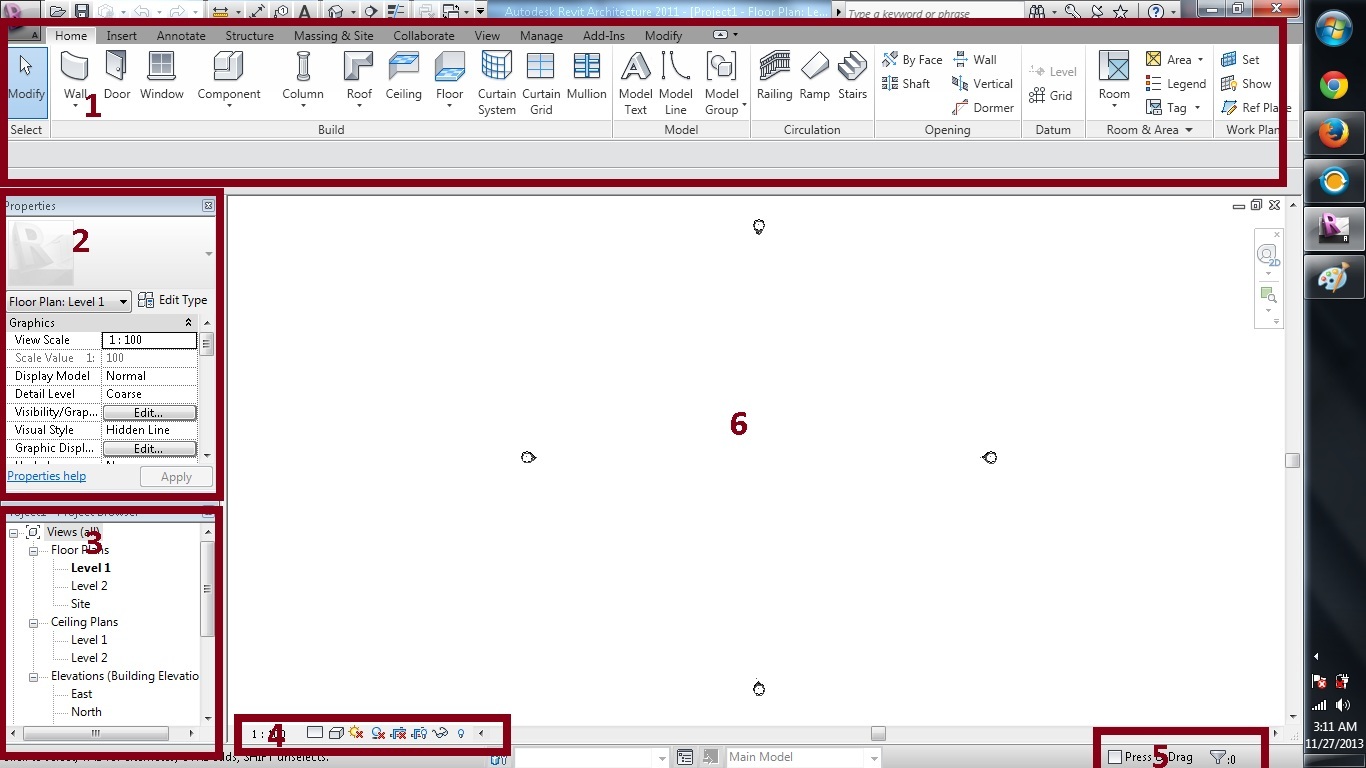
This is where you’ll work. Your canvas. I’ve divided it into 6 parts in order to explain it briefly. (don’t know the exact name of each… but here goes.)
- This is the Main Ribbon of Revit. This is where you’ll get your walls, floors, object, schedules, new camera view, hatch, etc. almost all model-creation tools are here, as well as the collaboration tools & some add-ins.
- The property bar. This is where you’ll look if you’re trying to find out the property of a selected object. (i.e. it’s height, area, volume, etc.) Also, this is where you’ll have to input/edit some data as well as controlling the visibility/options.
- The Project Browser. This is where you get your view of the projects. (whether plans, RCP, elevations, sections, details, etc.) Also, this is where you’ll gonna name your drawings. It’s kinda hard to explain…. but i’ll try to explain it next time.
- I don’t know what’s the official name of these icons, but these are the icons responsible on how you would like to see the models. (i.e. whether you want it to be in wireframe, shaded, etc. or to show the shadow cast, etc.)
- Press and drag & filter button. 2 things. NEVER CHECK THE PRESS AND DRAG! it’s just a pain in the ass if you’re coming from autocad. The filter button purpose is just to filter-out the selected objects.
- The canvas. This is where you’ll gonna model, draw, etc.
I’m kinda sleepy now. I’ll just cut the tutorial here and continue sometime this week or the next. (Whenever i have free time) Ciao!


 What a refreshing sight to behold! After coming from a 1.5 hour plane trip and 4hour trip by land (van), and sleeping for just 3 hours, it surely is a rewarding view!
 Happy Birthday Mama Mary!
 The 3 Knights (of Columbus)
 Getting ready to dance the long walk!
 Boronganons are all smiles!